So let me guess, your Explore 3 is in your house, sitting in its box. Maybe you even had a peek at the machine or braved the unpacking stage. But now you are left wondering just how to use the Cricut Explore 3 cutting machine.
Most people who are new to the world of Cricut crafting get a bit stressed out when they think about setting up their machine. The overwhelm gets even worse when they think about having to make something with this fancy machine.
We have all been there and we have all been beginners at some point, so I want to make the setup and first project super easy. I will share with you just how to use your Explore 3 as well as some tips and tricks to make crafting with your new Explore 3 fun and easy.
What is the Cricut Explore 3
The Cricut Explore 3 is the ultimate smart cutting machine. It has the ability to use advanced tools enabling it to cut over 100 different types of materials quickly and accurately.
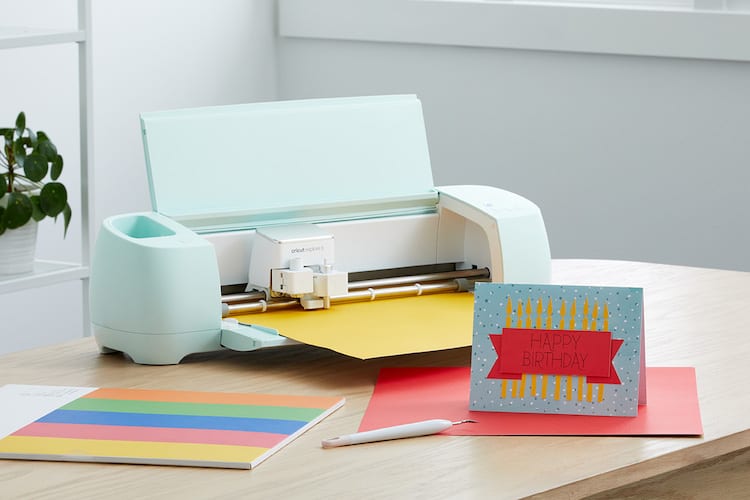
The Cricut Explore 3 is the latest machine in the Explore family and was released in June 2021. (If you haven't bought yours yet, you can read our Explore 3 review here)
NOTE: Cricut made substantial changes to the Explore Air 2 and the Maker. As the Explore 3 and Maker 3 were released together Cricut used the same name (thereby dropping the word Air) to communicate these similarities.
The Cricut Explore 3 is an electronic cutting machine that can be used on over 100 different materials just like its predecessor, the Explore Air 2.
It can cut materials from cardstock, vinyl & iron-on to glitter paper & bonded fabric.
The Explore 3 is compatible with my 6 different tools and blades as well as being able to use pens. This makes the crafting possibilities with the Cricut Explore 3 endless as you can cut, write, foil, score and so much more.
But enough about that, let's hop into how to unbox and set up your new machine.
How to Set Up Your Cricut Explore 3
Now that you have your Explore 3, it is important to get it set up properly so you can get crafting.
1. Unbox your machine and plug it in
- Unbox your new machine. To get started we need the machine out of the box and I need you to find the power cable as well.
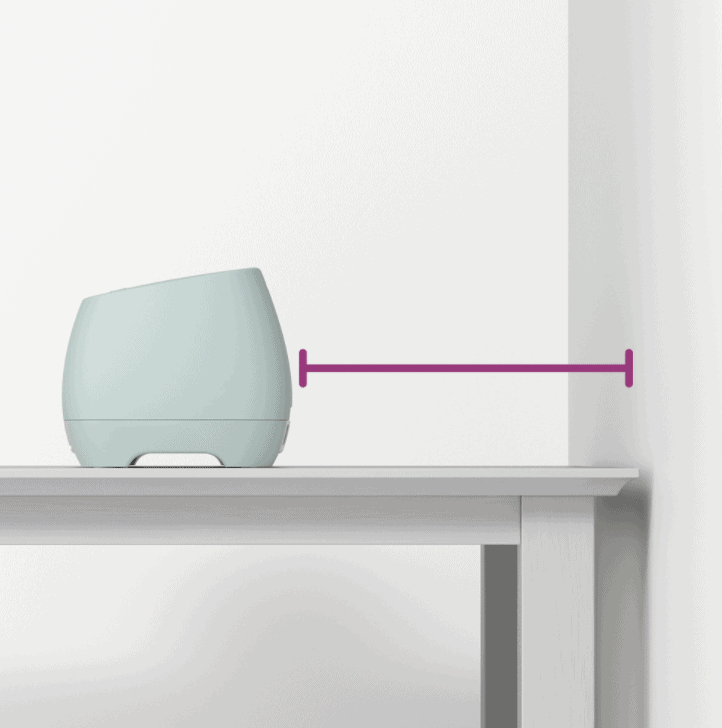
NOTE: Ensure that there is at least 10″ clear space at the back of the machine so that mats and materials can move freely from the front, through the machine, and out of the back (back and forth).
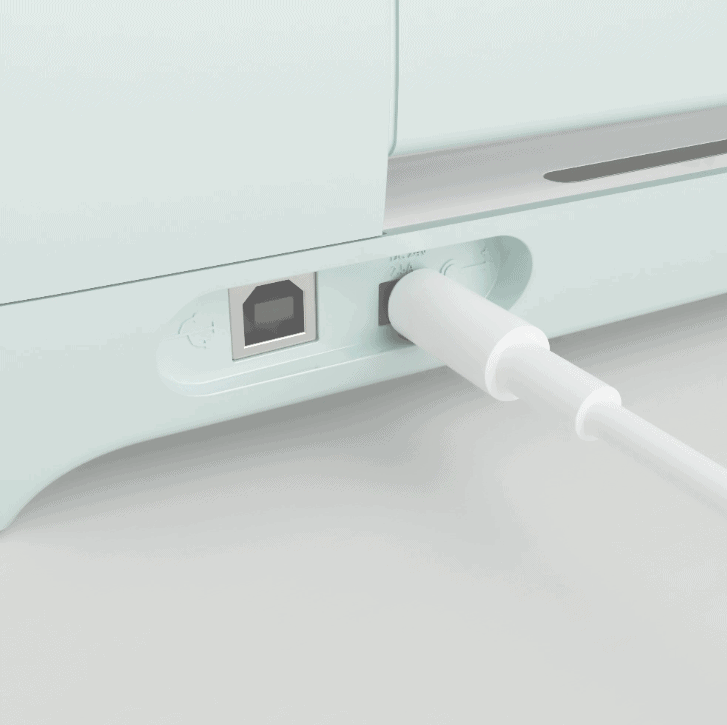
- Using the round end of the power cable supplied in the box, plug it into the back of the Cricut Explore 3 machine. Plug the other end into a power source.
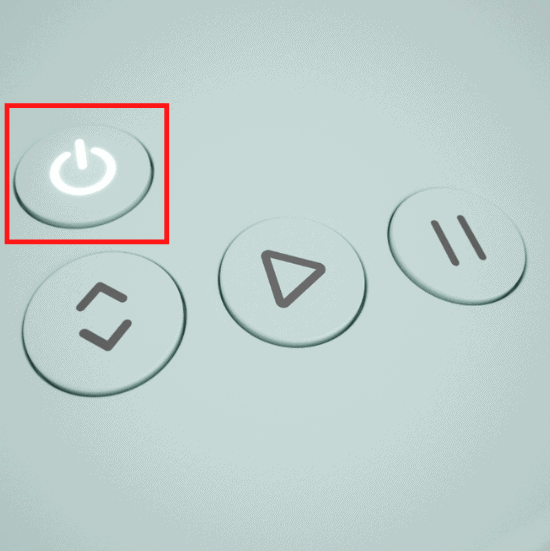
- Power on your Cricut Explore 3.
2. Connect Your Explore 3 to Your Computer
The Cricut Explore 3 can be connected to your computer by using the USB cable provided in the box and plugging it into the back of the machine and into your computer or you can also connect via Bluetooth.
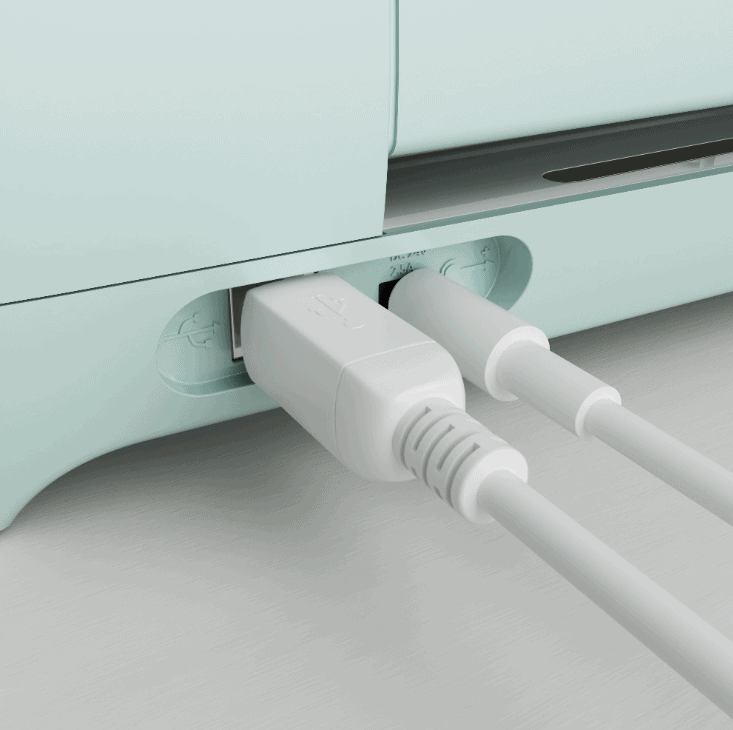
To connect via Bluetooth, follow the steps below:
- Ensure your Cricut Explore 3 is switched ON and plugged into the laptop.
- Make sure your device has Bluetooth enabled and is ON.
- Open “Bluetooth” on your device which will allow your device to search for other Bluetooth devices nearby.

- Select the Cricut Explore 3 device from the list of discovered devices (If you're prompted to enter a PIN, type 0000).
- Select Connect.
Set Up Cricut Design Space
Now that you have your Explore 3 connected to your device, the next part of the process is to set up Cricut Design Space.
If you have not done so already, you will need to download the Cricut Design Space app or software program at design.cricut.com/setup.
The Design Space program is where you will design and create your projects before cutting or sending them to your Cricut Explore 3 to be created. You can use this software on a laptop, iPad or Phone (via an app).
1. Downloading the Software
- Click on this link to start the download.
- Tick the box to agree to Cricut's Terms & Conditions, then click on “Download”.
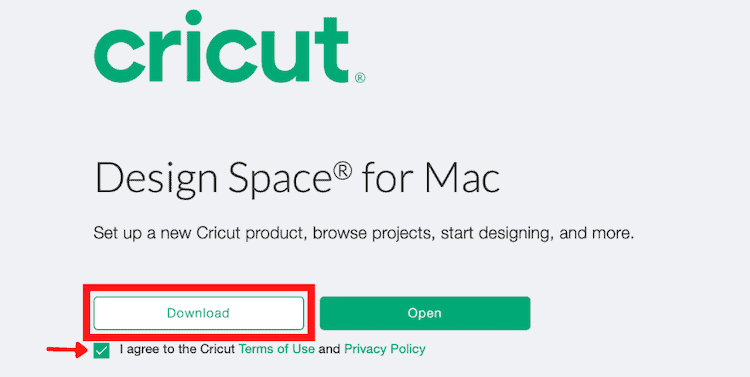
- Open your downloaded file. The setup wizard will automatically install the software for you.
2. Sign In to Cricut Design Space
- Create your profile and log-in information. Note: If you already have a Cricut ID you can simply log in.
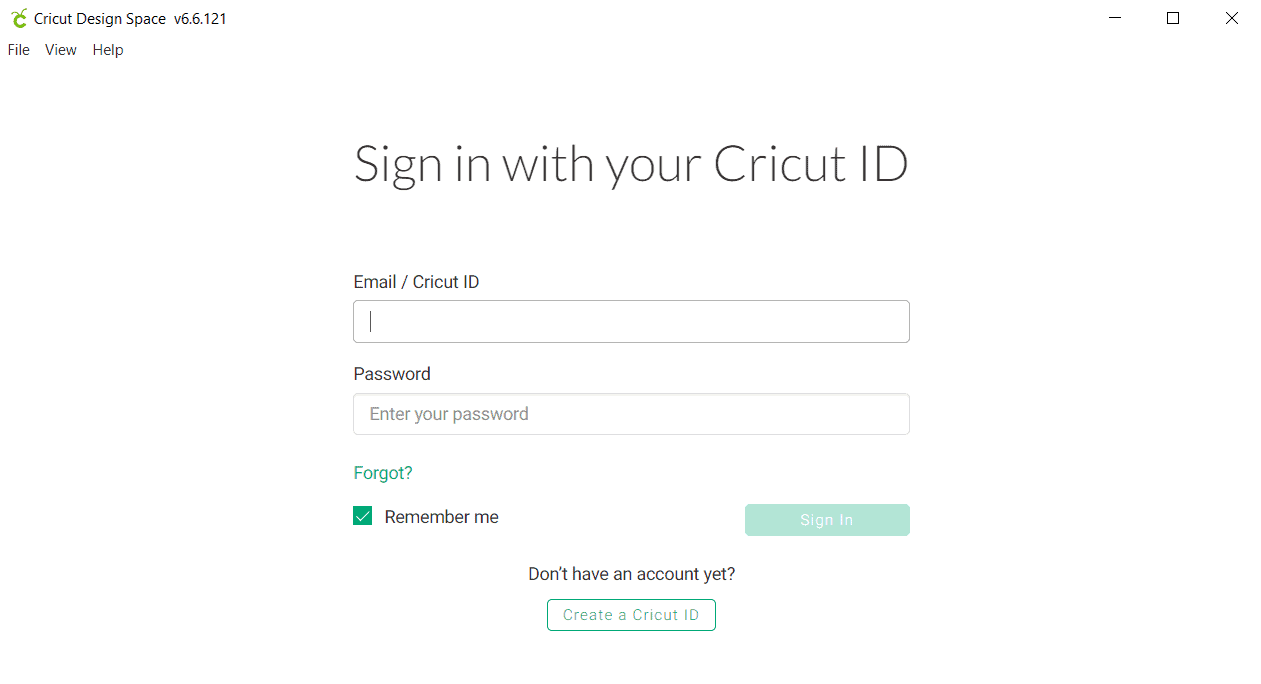
- Click on “New Product Set-Up” and select the Smart Cutting Machine.
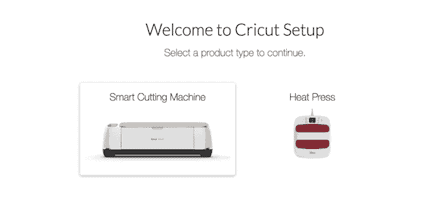
- Then select “Cricut Explore 3”.
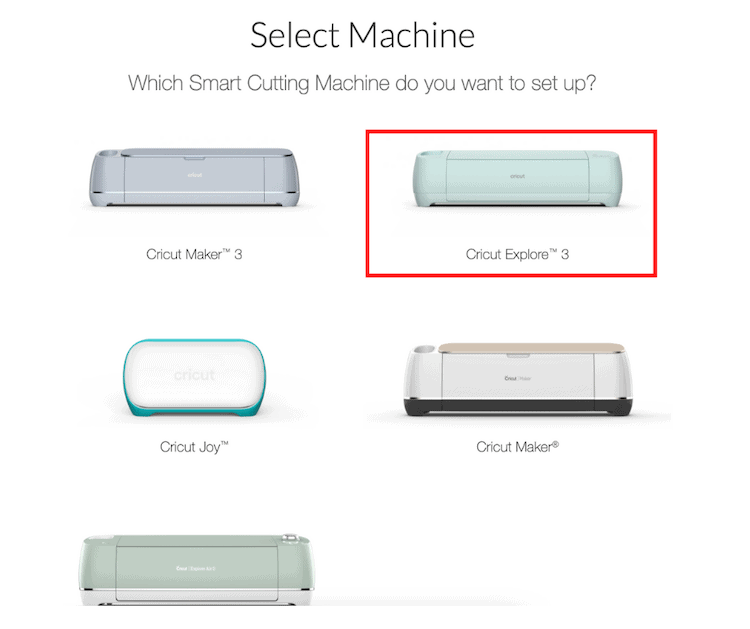
- Follow the instructions on the screen in order to connect your Cricut Explore 3 with Cricut Design Space.
Note: Your cutter HAS TO BE TURNED ON in order for the software to be able to connect to it.
- Click on “Update” if there are any new updates that need to be installed.
- Click on “Continue”. The Software will automatically register your cutter on your behalf.
- Click on “Next”.
Now you will have the option of doing a test cut. Whilst you can skip this step, I do highly recommend that you follow the instructions and make the first cut. It will help you to wrap your head around the basics of the machine.
I also recommend that you take up the Cricut Design Space trial as well. So sign up for that and set up an alarm in your phone to reassess the membership when the trial expires.
However, if you are in a bit of a rush, you can simply skip straight ahead to the first project. We have selected a nice and easy project to tackle for your first project and the steps for you to follow are below.
How to Use Cricut Explore 3: Your First Project
Congratulations! Now that your Explore 3 is connected to your device and you have downloaded Design Space, you can create your first project!

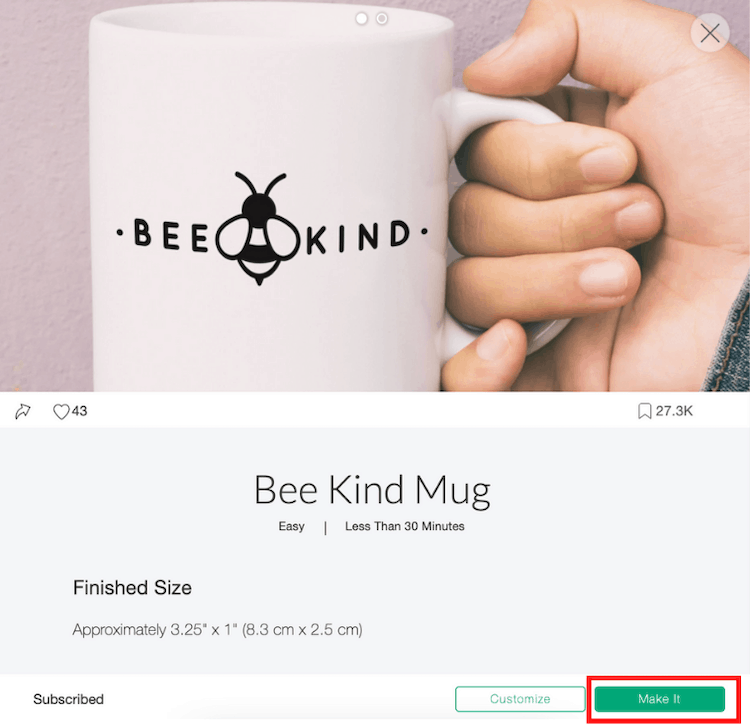
For this project, you will use your Cricut Explore 3 without a cutting mat. We are using a project from the Design Space Library called the “Be Kind Mug” Vinyl sticker.
By creating this project you will gain experience using the Cut function without a cutting mat as well as working with Cricut Smart Adhesive Vinyl.
As this is the first project, we will not customize the design and will simply create the project as is in Cricut Design Space.
Supplies Required for This Project:
- Cricut Explore 3
- A Blank White Mug (any mug from a local store will work)
- Black Cricut Smart Vinyl
- Weeding Tools (this is a really handy starter kit)
- Smart Vinyl Transfer Tape
1. Create the Project in Design Space
- Click on this link to open the project in Cricut Design Space.
- Click on “Open”.
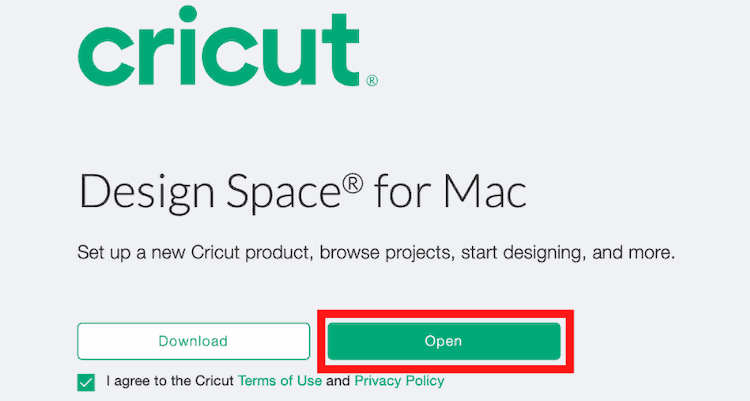
- Select “Open the Cricut Design Space Application.”
- Wait for Design Space to open up. You might have to click on the application to see it once it has loaded.
- The Bee Kind Vinyl Sticker Project should be up on your screen. On this screen you can browse the information to find detail on:
- the materials you will require;
- the time it will take;
- and the steps to create the project.
- Because this is your first project, we will skip any customization work and just make the project as is. Click on “Make It”.
2. Preparing Material & Project for Cutting
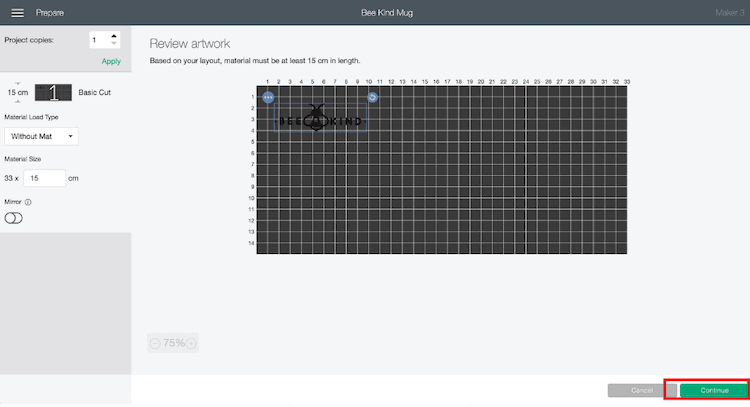
- The project will open on a project canvas in Design Space.
- Choose the option to cut without a cutting mat.
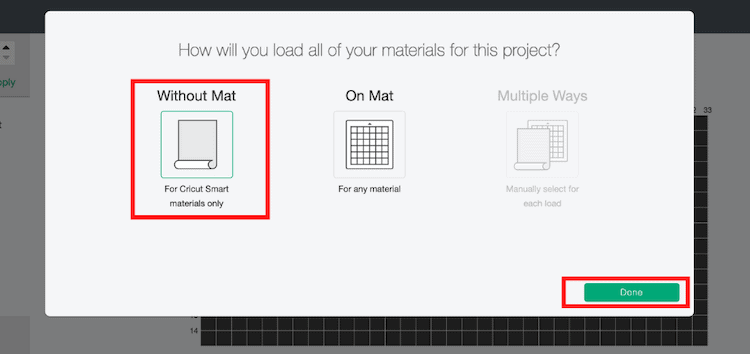
- Click on ‘Done'.
- Insert your Smart Vinyl into the machine under the guides up to the rollers.
- Click on “Continue”.
3. Send Your Project to Cut
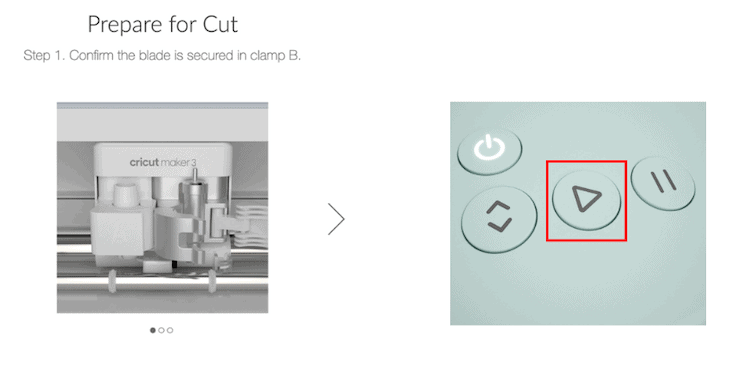
- The fine point blade should be installed in Clamp B.
- Press “GO” by pressing the blinking start button to begin cutting (the flashing Arrow/Triangle icon button).
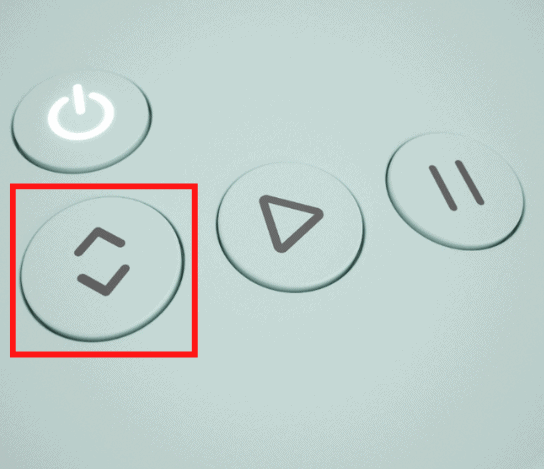
- When the machine is finished cutting, simply unload the Smart Vinyl when the machine is finished cutting by simply pressing the button that has two arrowheads.
- Next, we need to remove all of that excess vinyl around our design. First I suggest that you trim down your design.
- Then use your weeding hook (your fingers or a needle can work too) and carefully peel away the excess vinyl so that only your design is left. I like to start from the top left corner and peel across slowly in a semi-diagonal manner.
- Make sure to remove the inner pieces, like inside the ‘B' and inside the bee wings as well.
- Now add your sticker to the item of your choosing by using transfer tape to transfer the design. Peel the white backing away from the transfer tape. Then, place transfer tape sticky side down on your vinyl decal. Use a scraper to scrape over the back of the design.
- NOTE: I find that Smart Vinyl is slightly more challenging to work with, so you might need to apply pressure to the front and back to get the vinyl to stick to the transfer tape.
- Carefully peel back the transfer tape to lift the vinyl from its backing.
- Place the vinyl sticky side down onto your mug and rub it with the scraper.
- Peel away your transfer tape slowly.
- So easy right!!
There you have your first project using your Cricut Explore 3. Using your Explore 3 to create projects with a mat is super easy. Remember that you can only cut projects without a mat when using Cricut Smart Materials.
Let me know if you made this for your first project with your Cricut Explore 3!
Helpful Resources:
- Here is a list of the must-have Cricut Maker 3 accessories.
- Our Cricut book bundle will give you two of the best books to get started with a Cricut machine.
- Get started with another project. Find a suitable one in our list of Cricut tutorials here.

OMG this helped a lot. I’ve had my Cricut Explore 3 since Christmas. Haven’t had too much time to mess with it but every time I would read about it, it sounded so complicated. Thank you so much.
Hi Cheryl, I am so glad to hear that this has helped! Congratulations on your new Explore 3 – I hope you have lots of fun using it!